Difference between revisions of "Prism Of Light Gem Quest (Old)"
(→Crystaline Guardian) |
|||
| (21 intermediate revisions by 2 users not shown) | |||
| Line 1: | Line 1: | ||
| + | __TOC__ | ||
| + | |||
| + | |||
| + | == Quest Mobs and Items == | ||
| + | |||
This page shows the Prism of Light Gem Quest Monsters and Items. | This page shows the Prism of Light Gem Quest Monsters and Items. | ||
| − | + | ||
| − | + | === Glacial Water Elemental === | |
| − | + | ||
| − | + | Very easy enemy to defeat. Should be able to tank and use pets on him. | |
| + | |||
| + | '''Quest Item: [http://www.uoex.net/wiki/File:Jar_of_Glacial_Water.png Jar of Glacial Water]''' | ||
| + | |||
{| border="6" | {| border="6" | ||
| − | ! | + | !Glacial Water Elemental!!HP!!Phys Resist!!Fire Resist!!Cold Resist!!Poison Resist!!Energy Resist!!Quest Item!!Account Bound |
|- | |- | ||
|[[File:Glacial Water Elemental.png]] | |[[File:Glacial Water Elemental.png]] | ||
| Line 17: | Line 25: | ||
|align="center" "|[[File:Jar of Glacial Water.png]] | |align="center" "|[[File:Jar of Glacial Water.png]] | ||
|align="center" "|Yes | |align="center" "|Yes | ||
| − | |- | + | |} |
| + | |||
| + | === Ice Vortex === | ||
| + | |||
| + | Quite easy to defeat. Should be a fast and simple battle. Pets can speed up the process and the re-spawn is quite fast. | ||
| + | '''Quest Item: [http://www.uoex.net/wiki/File:Frozen_Soul.png Frozen Soul]''' | ||
| − | |||
| − | |||
| − | |||
| − | |||
{| border="6" | {| border="6" | ||
| − | ! | + | !Ice Vortex!!HP!!Phys Resist!!Fire Resist!!Cold Resist!!Poison Resist!!Energy Resist!!Quest Item!!Account Bound |
|- | |- | ||
|[[File:Ice Vortex.png]] | |[[File:Ice Vortex.png]] | ||
| Line 35: | Line 44: | ||
|align="center" "|[[File:Frozen Soul.png]] | |align="center" "|[[File:Frozen Soul.png]] | ||
|align="center" "|Yes | |align="center" "|Yes | ||
| − | | | + | |} |
| + | |||
| + | === Ice Wyrmling === | ||
| + | |||
| + | Quite easy to defeat. The most annoying part with these creatures are the amount of them spawned that can possibly make it semi difficult for the less seasoned player. Pets on guard works wonders for this. | ||
| + | '''Quest Item: [http://www.uoex.net/wiki/File:Ring_of_Ice.png Ring of Ice]''' | ||
| − | |||
| − | |||
| − | |||
| − | |||
{| border="6" | {| border="6" | ||
| − | ! | + | !Ice Wyrmling!!HP!!Phys Resist!!Fire Resist!!Cold Resist!!Poison Resist!!Energy Resist!!Quest Item!!Account Bound |
|- | |- | ||
|[[File:Ice Wyrmling.png]] | |[[File:Ice Wyrmling.png]] | ||
| Line 54: | Line 64: | ||
|align="center" "|[[File:Ring of Ice.png]] | |align="center" "|[[File:Ring of Ice.png]] | ||
|align="center" "|Yes | |align="center" "|Yes | ||
| − | | | + | |} |
| + | |||
| + | === Crystal Hydra === | ||
| + | |||
| + | Quite hard to defeat. Their daemon breath hits for about 300+. Best to stealth past and try to pull one at a time with your pets and discord as soon as you can. | ||
| + | '''Quest Item: [http://www.uoex.net/wiki/File:Hydra_Scale.png Hydra Scale]''' | ||
| − | |||
| − | |||
| − | |||
| − | |||
{| border="6" | {| border="6" | ||
| − | ! | + | !Crystal Hydra!!HP!!Phys Resist!!Fire Resist!!Cold Resist!!Poison Resist!!Energy Resist!!Quest Item!!Account Bound |
|- | |- | ||
|[[File:Crystal Hydra.png]] | |[[File:Crystal Hydra.png]] | ||
| Line 73: | Line 84: | ||
|align="center" "|[[File:Hydra Scale.png]] | |align="center" "|[[File:Hydra Scale.png]] | ||
|align="center" "|Yes | |align="center" "|Yes | ||
| − | | | + | |} |
| + | |||
| + | === Crystal Giant === | ||
| + | |||
| + | Can hit pretty hard. Three spawn in the area and be quite intense. The best way to go about this is to range attack them and kill all the surrounding mobs first. Enemy of One and Discording as soon as possible. | ||
| + | '''Quest Item: [http://www.uoex.net/wiki/File:Kristalen.png Kristalen]''' | ||
| − | |||
| − | |||
| − | |||
| − | |||
{| border="6" | {| border="6" | ||
| − | ! | + | !Crystal Giant!!HP!!Phys Resist!!Fire Resist!!Cold Resist!!Poison Resist!!Energy Resist!!Quest Item!!Account Bound |
|- | |- | ||
|[[File:Crystal Giant.png]] | |[[File:Crystal Giant.png]] | ||
| Line 92: | Line 104: | ||
|align="center" "|[[File:Kristalen.png]] | |align="center" "|[[File:Kristalen.png]] | ||
|align="center" "|Yes | |align="center" "|Yes | ||
| − | | | + | |} |
| + | === Frozen Mummy === | ||
| + | Simple to defeat. The quantity of these in the area should make for a quick chance to earn this GoC Quest Item. | ||
| + | '''Quest Item: [http://www.uoex.net/wiki/File:Icy_Heart.png Icy Heart]''' | ||
| − | |||
| − | |||
| − | |||
| − | |||
{| border="6" | {| border="6" | ||
| − | ! | + | !Frozen Mummy!!HP!!Phys Resist!!Fire Resist!!Cold Resist!!Poison Resist!!Energy Resist!!Quest Item!!Account Bound |
|- | |- | ||
|[[File:Frozen Mummy.png]] | |[[File:Frozen Mummy.png]] | ||
| Line 113: | Line 124: | ||
|align="center" "|[[File:Icy Heart.png]] | |align="center" "|[[File:Icy Heart.png]] | ||
|align="center" "|Yes | |align="center" "|Yes | ||
| − | |- | + | |} |
| + | |||
| + | === Shimmering Effusion === | ||
| + | |||
| + | Can be a hard boss to defeat. It uses peacemaking on you. It is also guarded by 3 Fetid Essences, which are basically the same as the Shimmering Effusion. The best way to go about this is to equip a yumi, and stealth up and attempt to pull only the effusion to the east end of the area for a one vs. one match-up. [[Imprisoned Pets]] are a plus on this monster. | ||
| + | |||
| + | '''Quest Item: [http://www.uoex.net/wiki/File:Prism_of_Light.png Prism of Light]''' | ||
| − | |||
| − | |||
| − | |||
| − | |||
{| border="6" | {| border="6" | ||
| − | ! | + | !Shimmering Effusion!!HP!!Phys Resist!!Fire Resist!!Cold Resist!!Poison Resist!!Energy Resist!!Quest Item!!Account Bound |
|- | |- | ||
|[[File:Shimmering Effusion.png]] | |[[File:Shimmering Effusion.png]] | ||
| Line 131: | Line 144: | ||
|align="center" "|[[File:Prism of Light.png]] | |align="center" "|[[File:Prism of Light.png]] | ||
|align="center" "|No | |align="center" "|No | ||
| − | | | + | |} |
| + | |||
| + | === Ice Wyrm === | ||
| + | |||
| + | Hardest monster in the entire quest. This beasts daemon breath hits for 1000+ every time it goes off and will kill whatever its target may be. Best way of attack is the same as defeating Chief Paroxysmus. [[Imprisoned Pets]] on it and hit it with a yumi from a distance, ressurecting and healing up your pets to send them back on it immediately. | ||
| + | |||
| + | |||
| + | '''Quest Item: [http://www.uoex.net/wiki/File:Ice_Wyrm_Spike.png Ice Wyrm Spike]''' | ||
| − | |||
| − | |||
| − | |||
| − | |||
{| border="6" | {| border="6" | ||
| − | ! | + | !Ice Wyrm!!HP!!Phys Resist!!Fire Resist!!Cold Resist!!Poison Resist!!Energy Resist!!Quest Item!!Account Bound |
|- | |- | ||
|[[File:Ice Wyrm.png]] | |[[File:Ice Wyrm.png]] | ||
| Line 149: | Line 165: | ||
|align="center" "|[[File:Ice Wyrm Spike.png]] | |align="center" "|[[File:Ice Wyrm Spike.png]] | ||
|align="center" "|No | |align="center" "|No | ||
| − | | | + | |} |
| − | |||
| − | |||
| + | [[Prism Of Light Gem Quest#Top | Return to Top]] | ||
== Five Crystal Shards will Shimmer == | == Five Crystal Shards will Shimmer == | ||
| Line 159: | Line 174: | ||
In order to battle the Shimmering Effusion you must collect 5 different crystal shards and place them in the summoning chest in the frozen mummy room. | In order to battle the Shimmering Effusion you must collect 5 different crystal shards and place them in the summoning chest in the frozen mummy room. | ||
| + | Here are the Mobs and Items dropped for summoning the Shimmering Effusion: | ||
| − | + | === Crystal Daemon === | |
| + | |||
| + | Pretty easy monster to defeat. Pets work well in this room and can make collecting this item faster and easier. | ||
| + | |||
| + | '''Summoning Item: [http://www.uoex.net/wiki/File:Fractured_Crystal.png Fractured Crystal]''' | ||
| − | |||
| − | |||
| − | |||
| − | |||
{| border="6" | {| border="6" | ||
| − | ! | + | !Crystal Daemon!!HP!!Phys Resist!!Fire Resist!!Cold Resist!!Poison Resist!!Energy Resist!!Summoning Item |
|- | |- | ||
|[[File:Crystal Daemon.png]] | |[[File:Crystal Daemon.png]] | ||
| Line 178: | Line 194: | ||
|align="center" "|32% | |align="center" "|32% | ||
|align="center" "|[[File:Fractured Crystal.png]] | |align="center" "|[[File:Fractured Crystal.png]] | ||
| − | | | + | |} |
| + | |||
| + | === Crystal Sea Serpent === | ||
| + | |||
| + | Easy to defeat. The hardest part of this might be trying to avoid any Crystal Hyrdas that might spawn or already be in the area. | ||
| + | '''Summoning Item: [http://www.uoex.net/wiki/File:Shattered_Crystal.png Shattered Crystal]''' | ||
| − | |||
| − | |||
| − | |||
| − | |||
{| border="6" | {| border="6" | ||
| − | ! | + | !Crystal Sea Serpent!!HP!!Phys Resist!!Fire Resist!!Cold Resist!!Poison Resist!!Energy Resist!!Summoning Item |
|- | |- | ||
|[[File:Crystal Sea Serpent.png]] | |[[File:Crystal Sea Serpent.png]] | ||
| Line 196: | Line 213: | ||
|align="center" "|19% | |align="center" "|19% | ||
|align="center" "|[[File:Shattered Crystal.png]] | |align="center" "|[[File:Shattered Crystal.png]] | ||
| − | | | + | |} |
| + | |||
| + | === Crystal Vortex === | ||
| + | |||
| + | Another easy one. Tanking with pets works fast and easy. | ||
| + | '''Summoning Item: [http://www.uoex.net/wiki/File:Piece_of_Crystal.png Piece of Crystal]''' | ||
| − | |||
| − | |||
| − | |||
| − | |||
{| border="6" | {| border="6" | ||
| − | ! | + | !Crystal Vortex!!HP!!Phys Resist!!Fire Resist!!Cold Resist!!Poison Resist!!Energy Resist!!Summoning Item |
|- | |- | ||
|[[File:Crystal Vortex.png]] | |[[File:Crystal Vortex.png]] | ||
| Line 214: | Line 232: | ||
|align="center" "|21% | |align="center" "|21% | ||
|align="center" "|[[File:Piece of Crystal.png]] | |align="center" "|[[File:Piece of Crystal.png]] | ||
| − | | | + | |} |
| + | |||
| + | === Crystalline Guardian === | ||
| + | |||
| + | Pretty easy but can pack a punch. Best to use pets on this monster for speed and accuracy. This monster is blue and will only attack negative karma players or if attacked first. | ||
| + | '''Summoning Item: [http://www.uoex.net/wiki/File:Scattered_Crystal.png Scattered Crystal]''' | ||
| − | |||
| − | |||
| − | |||
| − | |||
{| border="6" | {| border="6" | ||
| − | ! | + | !Crystaline Guardian!!HP!!Phys Resist!!Fire Resist!!Cold Resist!!Poison Resist!!Energy Resist!!Summoning Item |
|- | |- | ||
|[[File:Crystaline Guardian.png]] | |[[File:Crystaline Guardian.png]] | ||
| Line 232: | Line 251: | ||
|align="center" "|47% | |align="center" "|47% | ||
|align="center" "|[[File:Scattered Crystal.png]] | |align="center" "|[[File:Scattered Crystal.png]] | ||
| − | | | + | |} |
| + | |||
| + | === Unfrozen Mummy === | ||
| + | |||
| + | Pretty easy to defeat. Takes a little longer to defeat than the Frozen Mummy and spawns in groups. Pets are a plus here. | ||
| + | '''Summoning Item: [http://www.uoex.net/wiki/File:Broken_Crystal.png Broken Crystal]''' | ||
| − | |||
| − | |||
| − | |||
| − | |||
{| border="6" | {| border="6" | ||
| − | ! | + | !Unfrozen Mummy!!HP!!Phys Resist!!Fire Resist!!Cold Resist!!Poison Resist!!Energy Resist!!Summoning Item |
|- | |- | ||
|[[File:Unfrozen Mummy.png]] | |[[File:Unfrozen Mummy.png]] | ||
| Line 250: | Line 270: | ||
|align="center" "|26% | |align="center" "|26% | ||
|align="center" "|[[File:Broken Crystal.png]] | |align="center" "|[[File:Broken Crystal.png]] | ||
| − | | | + | |} |
| − | |||
| − | + | [[Prism Of Light Gem Quest#Top | Return to Top]] | |
== Guardians of the Light == | == Guardians of the Light == | ||
| Line 259: | Line 278: | ||
The Shimmering Effusion will be guarded by 3 Fetid Essence. You can choose to battle all 4 at once, or try to pull the Shimmering Effusion to a secluded area for a less intense battle. | The Shimmering Effusion will be guarded by 3 Fetid Essence. You can choose to battle all 4 at once, or try to pull the Shimmering Effusion to a secluded area for a less intense battle. | ||
| − | + | ||
| − | + | === Fetid Essence === | |
| − | + | ||
| + | Protector of the Shimmering Effusion. Spawns 3 at a time around the Effusion. If you cannot avoid the battle with these by pulling the shimmering effusion east. I would advise using pets on it. | ||
| + | |||
| + | '''Fetid Essence:''' | ||
| + | |||
{| border="6" | {| border="6" | ||
| − | ! | + | !Fetid Essence!!HP!!Phys Resist!!Fire Resist!!Cold Resist!!Poison Resist!!Energy Resist |
|- | |- | ||
|[[File:Fetid Essence.png]] | |[[File:Fetid Essence.png]] | ||
| Line 272: | Line 295: | ||
|align="center" "|59% | |align="center" "|59% | ||
|align="center" "|80% | |align="center" "|80% | ||
| − | | | + | |} |
| + | |||
| + | [[Prism Of Light Gem Quest#Top | Return to Top]] | ||
| + | |||
| + | == Dungeon Map == | ||
| + | |||
| + | [[File:Prism of Light Map.png]] | ||
| + | |||
| + | [[Prism Of Light Gem Quest#Top | Return to Top]] | ||
Latest revision as of 06:31, 11 September 2018
Contents
Quest Mobs and Items
This page shows the Prism of Light Gem Quest Monsters and Items.
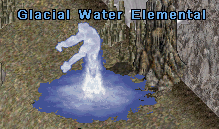
Glacial Water Elemental
Very easy enemy to defeat. Should be able to tank and use pets on him.
Quest Item: Jar of Glacial Water
| Glacial Water Elemental | HP | Phys Resist | Fire Resist | Cold Resist | Poison Resist | Energy Resist | Quest Item | Account Bound |
|---|---|---|---|---|---|---|---|---|
|
2651 HP | 35% | 17% | 22% | 64% | 6% | Yes |
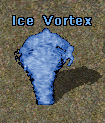
Ice Vortex
Quite easy to defeat. Should be a fast and simple battle. Pets can speed up the process and the re-spawn is quite fast. Quest Item: Frozen Soul
| Ice Vortex | HP | Phys Resist | Fire Resist | Cold Resist | Poison Resist | Energy Resist | Quest Item | Account Bound |
|---|---|---|---|---|---|---|---|---|
|
1430 HP | 47% | 8% | 70% | 48% | 24% | Yes |
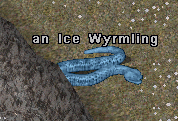
Ice Wyrmling
Quite easy to defeat. The most annoying part with these creatures are the amount of them spawned that can possibly make it semi difficult for the less seasoned player. Pets on guard works wonders for this.
Quest Item: Ring of Ice
| Ice Wyrmling | HP | Phys Resist | Fire Resist | Cold Resist | Poison Resist | Energy Resist | Quest Item | Account Bound |
|---|---|---|---|---|---|---|---|---|
|
500 HP | 45% | 56% | 43% | 22% | 37% | Yes |
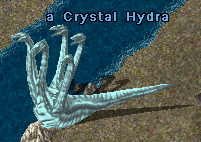
Crystal Hydra
Quite hard to defeat. Their daemon breath hits for about 300+. Best to stealth past and try to pull one at a time with your pets and discord as soon as you can.
Quest Item: Hydra Scale
| Crystal Hydra | HP | Phys Resist | Fire Resist | Cold Resist | Poison Resist | Energy Resist | Quest Item | Account Bound |
|---|---|---|---|---|---|---|---|---|
|
10000 HP | 69% | 80% | 33% | 35% | 43% | Yes |
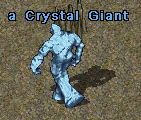
Crystal Giant
Can hit pretty hard. Three spawn in the area and be quite intense. The best way to go about this is to range attack them and kill all the surrounding mobs first. Enemy of One and Discording as soon as possible.
Quest Item: Kristalen
| Crystal Giant | HP | Phys Resist | Fire Resist | Cold Resist | Poison Resist | Energy Resist | Quest Item | Account Bound |
|---|---|---|---|---|---|---|---|---|
|
7002 HP | 56% | 51% | 50% | 50% | 53% | 
|
Yes |
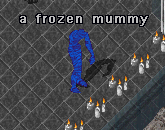
Frozen Mummy
Simple to defeat. The quantity of these in the area should make for a quick chance to earn this GoC Quest Item.
Quest Item: Icy Heart
| Frozen Mummy | HP | Phys Resist | Fire Resist | Cold Resist | Poison Resist | Energy Resist | Quest Item | Account Bound |
|---|---|---|---|---|---|---|---|---|
|
268 HP | 51% | 14% | 74% | 21% | 24% | Yes |
Shimmering Effusion
Can be a hard boss to defeat. It uses peacemaking on you. It is also guarded by 3 Fetid Essences, which are basically the same as the Shimmering Effusion. The best way to go about this is to equip a yumi, and stealth up and attempt to pull only the effusion to the east end of the area for a one vs. one match-up. Imprisoned Pets are a plus on this monster.
Quest Item: Prism of Light
| Shimmering Effusion | HP | Phys Resist | Fire Resist | Cold Resist | Poison Resist | Energy Resist | Quest Item | Account Bound |
|---|---|---|---|---|---|---|---|---|

|
10000 HP | 75% | 64% | 67% | 80% | 76% | No |
Ice Wyrm
Hardest monster in the entire quest. This beasts daemon breath hits for 1000+ every time it goes off and will kill whatever its target may be. Best way of attack is the same as defeating Chief Paroxysmus. Imprisoned Pets on it and hit it with a yumi from a distance, ressurecting and healing up your pets to send them back on it immediately.
Quest Item: Ice Wyrm Spike
| Ice Wyrm | HP | Phys Resist | Fire Resist | Cold Resist | Poison Resist | Energy Resist | Quest Item | Account Bound |
|---|---|---|---|---|---|---|---|---|

|
43246 HP | 67% | 86% | 79% | 64% | 60% | No |
Five Crystal Shards will Shimmer
In order to battle the Shimmering Effusion you must collect 5 different crystal shards and place them in the summoning chest in the frozen mummy room.
Here are the Mobs and Items dropped for summoning the Shimmering Effusion:
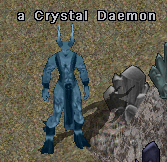
Crystal Daemon
Pretty easy monster to defeat. Pets work well in this room and can make collecting this item faster and easier.
Summoning Item: Fractured Crystal
| Crystal Daemon | HP | Phys Resist | Fire Resist | Cold Resist | Poison Resist | Energy Resist | Summoning Item |
|---|---|---|---|---|---|---|---|
|
4300 HP | 59% | 73% | 11% | 58% | 32% |
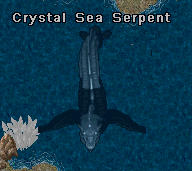
Crystal Sea Serpent
Easy to defeat. The hardest part of this might be trying to avoid any Crystal Hyrdas that might spawn or already be in the area.
Summoning Item: Shattered Crystal
| Crystal Sea Serpent | HP | Phys Resist | Fire Resist | Cold Resist | Poison Resist | Energy Resist | Summoning Item |
|---|---|---|---|---|---|---|---|
|
232 HP | 28% | 59% | 37% | 39% | 19% |
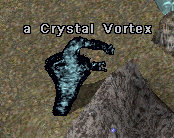
Crystal Vortex
Another easy one. Tanking with pets works fast and easy.
Summoning Item: Piece of Crystal
| Crystal Vortex | HP | Phys Resist | Fire Resist | Cold Resist | Poison Resist | Energy Resist | Summoning Item |
|---|---|---|---|---|---|---|---|
|
1448 HP | 47% | 5% | 70% | 46% | 21% | 
|
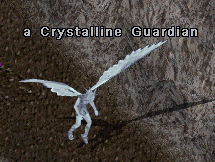
Crystalline Guardian
Pretty easy but can pack a punch. Best to use pets on this monster for speed and accuracy. This monster is blue and will only attack negative karma players or if attacked first.
Summoning Item: Scattered Crystal
| Crystaline Guardian | HP | Phys Resist | Fire Resist | Cold Resist | Poison Resist | Energy Resist | Summoning Item |
|---|---|---|---|---|---|---|---|
|
4250 HP | 88% | 43% | 40% | 50% | 47% |
Unfrozen Mummy
Pretty easy to defeat. Takes a little longer to defeat than the Frozen Mummy and spawns in groups. Pets are a plus here.
Summoning Item: Broken Crystal
| Unfrozen Mummy | HP | Phys Resist | Fire Resist | Cold Resist | Poison Resist | Energy Resist | Summoning Item |
|---|---|---|---|---|---|---|---|

|
2200 HP | 46% | 15% | 73% | 26% | 26% | 
|
Guardians of the Light
The Shimmering Effusion will be guarded by 3 Fetid Essence. You can choose to battle all 4 at once, or try to pull the Shimmering Effusion to a secluded area for a less intense battle.
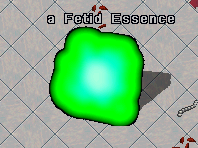
Fetid Essence
Protector of the Shimmering Effusion. Spawns 3 at a time around the Effusion. If you cannot avoid the battle with these by pulling the shimmering effusion east. I would advise using pets on it.
Fetid Essence:
| Fetid Essence | HP | Phys Resist | Fire Resist | Cold Resist | Poison Resist | Energy Resist |
|---|---|---|---|---|---|---|
|
10000 HP | 68% | 67% | 47% | 59% | 80% |
