Difference between revisions of "Blighted Grove Gem Quest"
m (→Lady Melisande: added link to mob info) |
|||
| (43 intermediate revisions by 2 users not shown) | |||
| Line 1: | Line 1: | ||
| − | + | __TOC__ | |
| + | |||
| + | |||
This page shows the Blighted Grove Gem Quest Monsters and Items. | This page shows the Blighted Grove Gem Quest Monsters and Items. | ||
| + | == Thrasher == | ||
| + | The Thrasher is by far the easiest creature in Blighted Grove. 3 of them spawn at a time near the entrance. | ||
| − | + | '''Quest Item: [http://www.uoex.net/wiki/File:Thrashers_Scale.png Thrasher's Scale]''' | |
| − | |||
| − | |||
| − | |||
| − | |||
{| border="6" | {| border="6" | ||
| − | ! | + | ![http://www.uoex.net/wiki/Thrasher Thrasher] !!HP!!Phys Resist!!Fire Resist!!Cold Resist!!Poison Resist!!Energy Resist!!Quest Item!!Account Bound |
|- | |- | ||
|[[File:Thrasher.png]] | |[[File:Thrasher.png]] | ||
| Line 22: | Line 22: | ||
|align="center" "|[[File:Thrashers Scale.png]] | |align="center" "|[[File:Thrashers Scale.png]] | ||
|align="center" "|No | |align="center" "|No | ||
| − | | | + | |} |
| + | |||
| + | == Abscess == | ||
| + | The Abcess can be quite difficult for newer players or players with lower hp. A great plan might be to enter Blighted Grove stealthing with pets out ready to strike. 3 Abscess sit at the entrance. | ||
| + | '''Quest Item: [http://www.uoex.net/wiki/File:Abscesstooth.png Abscess Tooth]''' | ||
| − | |||
| − | |||
| − | |||
| − | |||
{| border="6" | {| border="6" | ||
| − | ! | + | ![http://www.uoex.net/wiki/Abscess Abscess] !!HP!!Phys Resist!!Fire Resist!!Cold Resist!!Poison Resist!!Energy Resist!!Quest Item!!Account Bound |
|- | |- | ||
|[[File:Abscess.png]] | |[[File:Abscess.png]] | ||
| Line 42: | Line 42: | ||
|align="center" "|[[File:Abscesstooth.png]] | |align="center" "|[[File:Abscesstooth.png]] | ||
|align="center" "|Yes | |align="center" "|Yes | ||
| − | | | + | |} |
| + | |||
| + | == Tangle == | ||
| + | The Tangle is another easy creature in Blighted Grove. It sits in the Center of Level 1. | ||
| + | '''Quest Item: [http://www.uoex.net/wiki/File:Tangle_Fluid.png Tangle Fluid]''' | ||
| − | |||
| − | |||
| − | |||
| − | |||
{| border="6" | {| border="6" | ||
| − | ! | + | ![http://www.uoex.net/wiki/Tangle Tangle] !!HP!!Phys Resist!!Fire Resist!!Cold Resist!!Poison Resist!!Energy Resist!!Quest Item!!Account Bound |
|- | |- | ||
|[[File:Tangle.png]] | |[[File:Tangle.png]] | ||
| Line 62: | Line 62: | ||
|align="center" "|[[File:Tangle Fluid.png]] | |align="center" "|[[File:Tangle Fluid.png]] | ||
|align="center" "|Yes | |align="center" "|Yes | ||
| − | | | + | |} |
| + | |||
| + | == Insane Dryad == | ||
| + | Insane Dryads can be aggravating. They are hard to see, and are "blue". Pets can take this creature down with ease. 3 of them spawn on the west side of Level 1. | ||
| + | '''Quest Item: [http://www.uoex.net/wiki/File:Insanity_Taffy.png Insanity Taffy]''' | ||
| − | |||
| − | |||
| − | |||
| − | |||
{| border="6" | {| border="6" | ||
| − | ! | + | ![http://www.uoex.net/wiki/Insane_Dryad Insane Dryad]!!HP!!Phys Resist!!Fire Resist!!Cold Resist!!Poison Resist!!Energy Resist!!Quest Item!!Account Bound |
|- | |- | ||
|[[File:InsaneDryad.png]] | |[[File:InsaneDryad.png]] | ||
| Line 82: | Line 82: | ||
|align="center" "|[[File:Insanity Taffy.png]] | |align="center" "|[[File:Insanity Taffy.png]] | ||
|align="center" "|Yes | |align="center" "|Yes | ||
| − | | | + | |} |
| + | |||
| + | == Saliva == | ||
| + | The Saliva is an easy monster to defeat, but time consuming. It has low resists but has a lot of life in him. He is found on the west side of Level 1. | ||
| + | '''Quest Item: [http://www.uoex.net/wiki/File:Dream_Catcher.png Dream Catcher]''' | ||
| − | |||
| − | |||
| − | |||
| − | |||
{| border="6" | {| border="6" | ||
| − | ! | + | ![http://www.uoex.net/wiki/Saliva Saliva]!!HP!!Phys Resist!!Fire Resist!!Cold Resist!!Poison Resist!!Energy Resist!!Quest Item!!Account Bound |
|- | |- | ||
|[[File:Saliva.png]] | |[[File:Saliva.png]] | ||
| Line 102: | Line 102: | ||
|align="center" "|[[File:Dream Catcher.png]] | |align="center" "|[[File:Dream Catcher.png]] | ||
|align="center" "|Yes | |align="center" "|Yes | ||
| − | | | + | |} |
| + | |||
| + | == Drevo == | ||
| + | Drevo resides on Level 2 between the entrance and Lady Melisande. Drevo hits a little hard but is easily defeated with Discord and a good strategy. | ||
| + | '''Quest Item: [http://www.uoex.net/wiki/File:Remnants_Of_An_Ancient_Ent.png Remnants of an Ancient Ent]''' | ||
| − | |||
| − | |||
| − | |||
| − | |||
{| border="6" | {| border="6" | ||
| − | ! | + | ![http://www.uoex.net/wiki/Drevo Drevo]!!HP!!Phys Resist!!Fire Resist!!Cold Resist!!Poison Resist!!Energy Resist!!Quest Item!!Account Bound |
|- | |- | ||
|[[File:Drevo.png]] | |[[File:Drevo.png]] | ||
| Line 122: | Line 122: | ||
|align="center" "|[[File:Remnants_Of_An_Ancient_Ent.png]] | |align="center" "|[[File:Remnants_Of_An_Ancient_Ent.png]] | ||
|align="center" "|Yes | |align="center" "|Yes | ||
| − | | | + | |} |
| + | |||
| + | == Lady Melisande == | ||
| + | Lady Melisande can be difficult to defeat. She summons Satyrs to her side throughout the battle. These Satyrs die fast, but can be a menace. They peacemake you often. Lady Melisande also has a wide range of spawning with a lower hp/str version, to a much harder, higher str/hp version. The best plan to go about this battle for a lot is pets and lots of healing them. Another good idea is to use a Yumi using either Armor Pierce or Mounted Double Shot, switching to Momentum Strike as she summons satyrs. | ||
| + | '''Quest Item: [http://www.uoex.net/wiki/File:Lady_Melisandes_Spellbook.png Lady Melisande's Spellbook]''' | ||
| − | |||
| − | |||
| − | |||
| − | |||
{| border="6" | {| border="6" | ||
| − | ! | + | ![http://www.uoex.net/wiki/Lady_Melisande Lady Melisande]!!HP!!Phys Resist!!Fire Resist!!Cold Resist!!Poison Resist!!Energy Resist!!Quest Item!!Account Bound |
|- | |- | ||
|[[File:LadyMelisande.png]] | |[[File:LadyMelisande.png]] | ||
| Line 142: | Line 142: | ||
|align="center" "|[[File:Lady_Melisandes_Spellbook.png]] | |align="center" "|[[File:Lady_Melisandes_Spellbook.png]] | ||
|align="center" "|No | |align="center" "|No | ||
| − | | | + | |} |
| + | |||
| + | [[Blighted Grove Gem Quest#Top | Back to Top]] | ||
| + | |||
| + | == Dungeon Map == | ||
| + | |||
| + | [[File:Blighted Dungeon Map.png]] | ||
Latest revision as of 10:37, 30 April 2015
Contents
This page shows the Blighted Grove Gem Quest Monsters and Items.
Thrasher
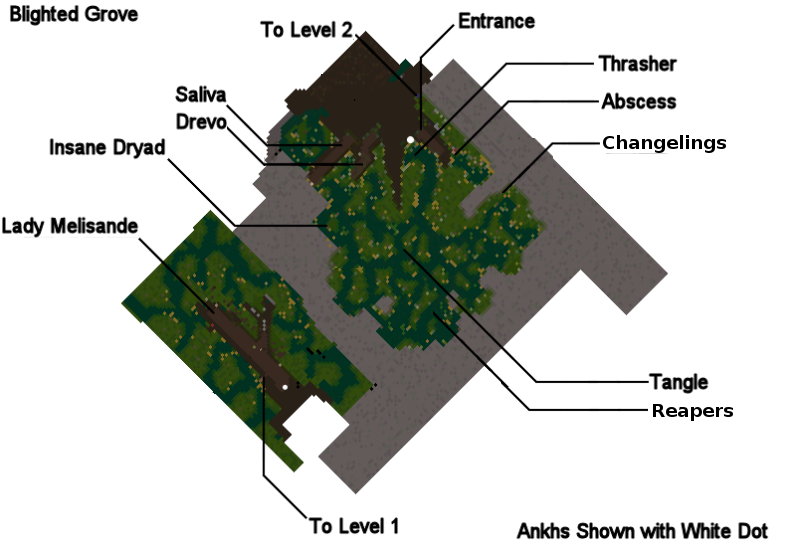
The Thrasher is by far the easiest creature in Blighted Grove. 3 of them spawn at a time near the entrance.
Quest Item: Thrasher's Scale
| Thrasher | HP | Phys Resist | Fire Resist | Cold Resist | Poison Resist | Energy Resist | Quest Item | Account Bound |
|---|---|---|---|---|---|---|---|---|

|
500-1500 HP | 55% | 25-30% | 0 | 30-35% | 0 | No |
Abscess
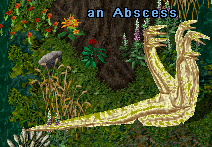
The Abcess can be quite difficult for newer players or players with lower hp. A great plan might be to enter Blighted Grove stealthing with pets out ready to strike. 3 Abscess sit at the entrance.
Quest Item: Abscess Tooth
| Abscess | HP | Phys Resist | Fire Resist | Cold Resist | Poison Resist | Energy Resist | Quest Item | Account Bound |
|---|---|---|---|---|---|---|---|---|

|
2237 HP | 69% | 79% | 34% | 43% | 35% | Yes |
Tangle
The Tangle is another easy creature in Blighted Grove. It sits in the Center of Level 1.
Quest Item: Tangle Fluid
| Tangle | HP | Phys Resist | Fire Resist | Cold Resist | Poison Resist | Energy Resist | Quest Item | Account Bound |
|---|---|---|---|---|---|---|---|---|

|
1028 HP | 31% | 21% | 12% | 42% | 25% | Yes |
Insane Dryad
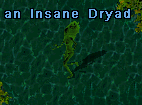
Insane Dryads can be aggravating. They are hard to see, and are "blue". Pets can take this creature down with ease. 3 of them spawn on the west side of Level 1.
Quest Item: Insanity Taffy
| Insane Dryad | HP | Phys Resist | Fire Resist | Cold Resist | Poison Resist | Energy Resist | Quest Item | Account Bound |
|---|---|---|---|---|---|---|---|---|

|
5262 HP | 44% | 16% | 44% | 33% | 33% | Yes |
Saliva
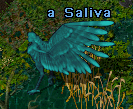
The Saliva is an easy monster to defeat, but time consuming. It has low resists but has a lot of life in him. He is found on the west side of Level 1.
Quest Item: Dream Catcher
| Saliva | HP | Phys Resist | Fire Resist | Cold Resist | Poison Resist | Energy Resist | Quest Item | Account Bound |
|---|---|---|---|---|---|---|---|---|

|
22165 HP | 30% | 20% | 26% | 28% | 18% | Yes |
Drevo
Drevo resides on Level 2 between the entrance and Lady Melisande. Drevo hits a little hard but is easily defeated with Discord and a good strategy.
Quest Item: Remnants of an Ancient Ent
| Drevo | HP | Phys Resist | Fire Resist | Cold Resist | Poison Resist | Energy Resist | Quest Item | Account Bound |
|---|---|---|---|---|---|---|---|---|

|
1798 HP | 44% | 39% | 50% | 50% | 49% | Yes |
Lady Melisande
Lady Melisande can be difficult to defeat. She summons Satyrs to her side throughout the battle. These Satyrs die fast, but can be a menace. They peacemake you often. Lady Melisande also has a wide range of spawning with a lower hp/str version, to a much harder, higher str/hp version. The best plan to go about this battle for a lot is pets and lots of healing them. Another good idea is to use a Yumi using either Armor Pierce or Mounted Double Shot, switching to Momentum Strike as she summons satyrs.
Quest Item: Lady Melisande's Spellbook
| Lady Melisande | HP | Phys Resist | Fire Resist | Cold Resist | Poison Resist | Energy Resist | Quest Item | Account Bound |
|---|---|---|---|---|---|---|---|---|

|
20000 HP | 54% | 46% | 61% | 71% | 78% | No |
